As I've been reducing the amount of stuff cluttering my pantry, one of the things that I didn't replace after finishing was the box of pancake mix. Because, guess what? I've found out you can make them completely from scratch almost as easily with stuff that I already keep stocked. This recipe was adapted from Charles' Pancakes from Scratch at Cooks.com.
When I make pancakes, I like to make a lot more than we'll eat for one breakfast, so I can freeze the extras to reheat on hurried weekday mornings. Tips on how to freeze and reheat pancakes are included in this post.
This morning, John had a craving for chocolate chips, so I added those to his for the same-day breakfast. However, I plan to eat the extras myself and like them plain, so most were chocolate-free.
The Ingredients
(Makes about 16-18 pancakes)- 2 cups of milk (I used almond milk, but regular low fat milk will work too)
- 2 eggs
- 1 teaspoon of vanilla extract
- 2 cups of all-purpose flour
- 4 teaspoons of baking powder
- 1 teaspoon of salt
- Chocolate chips (optional)
The Steps:
- Beat together the 2 eggs, 2 cups of milk, and 1 teaspoon of vanilla extract, in a large bowl. (Preferably one with a pour spout.)
- In a separate bowl, place 2 cups of all-purpose flour. When I add flour to a recipe, I like to sift it (and did when I made this), but it's probably not necessary if you don't have time or don't mind pancakes that are a little dense.
- Add to the flour 4 teaspoons of baking powder and 1 teaspoon of salt, then stir to combine.
- Add the dry ingredients to the wet ingredients. Stir all together until somewhat smooth. It should still have some lumps.
- Heat griddle or pan, spray with a cooking spray, then pour a little batter onto pan.
- When the top bubbles and the sides start turning a light golden brown, turn and cook on the other side.
- To flash freeze extra pancakes:
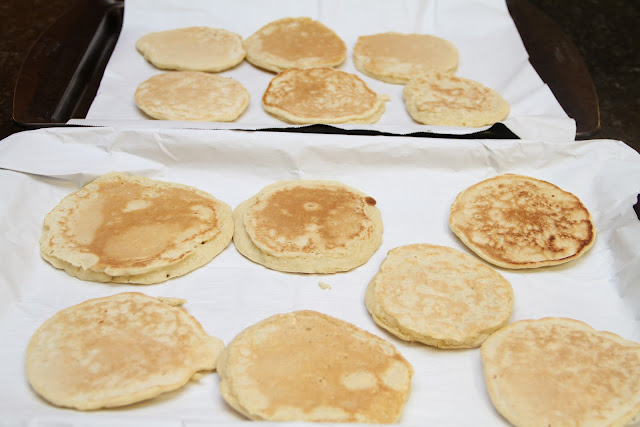
- Place parchment paper on baking sheets and add pancakes in a single layer. Allow to cool on the counter.
- Once pancakes are room temperature, put the baking sheet filled with pancakes in the freezer. (You can layer more than one level of pancakes, just make sure there's parchment paper between the layers.)
- Freeze for about 2-6 hours, or until pancakes are completely hardened.
- Transfer to a plastic bag or container to conserve room in your freezer.
- To reheat the pancakes, just place on a plate and microwave for about 1:30.
The Photos:
Add 2 cups of milk, 2 eggs, and 1 teaspoon of vanilla extract to a large bowl.
Beat with a fork until well combined.
Measure two cups of flour, and then sift if you prefer. Sifting isn't a requirement, but I feel like it makes them fluffier. (John took this lovely picture of me, since both my hands were busy. Check out my fancy Lazy Sunday outfit!)
I use this mesh strainer to sift the flour. You can either gently spread it around with a fork to get it to go through, or shake the strainer side to side. I do both.
Here's the flour after sifting.
Add 4 teaspoons of baking powder, and 1 teaspoon of salt.
Stir together with a fork to combine.
Add the dry ingredients to the wet ingredients and stir with a fork or whisk. A few lumps are good, you don't want to overmix.
Spray some cooking spray onto your pre-heated pan. (I try not to use aerosol sprays on my nice pans, since it can cause a build-up. So instead, I use this pump-action bottle from Pampered Chef. It's just filled with olive oil.)
Then, pour some pancake batter onto the pan. My pan fits about 3 pancakes. When it has bubbles on top and the sides start to look golden brown, it's time to flip.
I flipped this one a little on the early side. But I don't like them too well done.
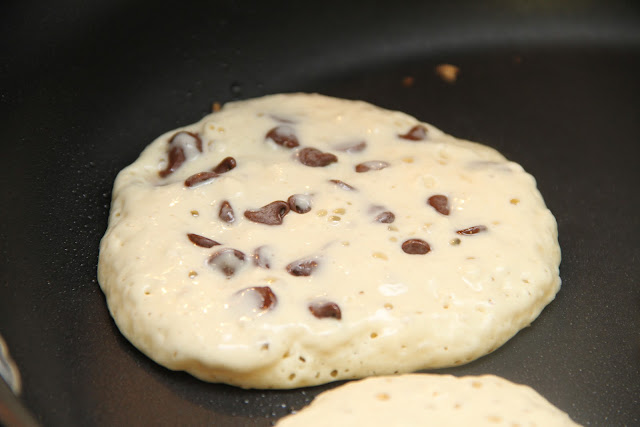
For John's special chocolate chip ones, I just added some chips in as soon as I poured the batter onto the pan.
Then, I pushed them down with my finger to make sure they were in the center of the pancake.
They turned out pretty good! If you want chocolate chips in all of your pancakes, you might find it easier to mix them right into the batter, rather than hand-placing them in while the pancake is cooking.
This big Pampered Chef bowl is perfect for pouring pancake batter! (No, I don't sell Pampered Chef, I just love their stuff!)
Here are most of the pancakes (John had already devoured his!)
After we were done eating, I put the leftovers onto parchment paper to cool completely.
Once they were cooled to room temperature, I stacked the two layers of parchment on top of each other and placed the baking sheet into the freezer.
After about 2 hours (it might be longer, depending on the size of your pancakes), they were sufficiently frozen. You want them to be hard enough so that they won't freeze to each other once you put them together into a bag. (I re-use the bag that they go in, so that's why I crossed off a previous date, and then added the new date.)
I fold up the parchment paper (the kind I bought has foil on one side, parchment on the other) and save it in a drawer for the next batch of something to be flash frozen.
Reheating the frozen pancakes for breakfast is quicker than making toast! Just pull a couple out of the bag, put on a microwave-safe plate, and nuke for about a minute and a half. Add a bit of butter (my favorite), syrup, peanut butter, or whatever you like, and there you have it! A made-from-scratch hot breakfast in two minutes.


Jacki -
ReplyDeleteI freeze mine too, but I put them in the toaster to reheat, that way they are crispier...try it once and you won't microwave them again :)
Abby
Hey Abby!
DeleteI should have mentioned that option in the post! I've actually tried reheating both ways, but I for some reason like them better from the microwave. It's weird, because I usually like things crispy, but this is one rare exception!
Thanks for posting this! I made a big batch this morning to freeze! My little Sous chef, Adrianna, loved to help with these!
ReplyDeleteAww, sounds like fun mommy-daughter time!
DeleteThank you for some other informative blog. Where else could I get that type of information written in such an ideal means? I have a mission that I’m just now working on, and I have been at the look out for such information. ems machine body sculpting
ReplyDelete